Continuous Delivery pipeline for Godot and itch.io
Mar 2 2020 · 5 min read · Comments
During the recent Godot Wild Jam 18, I implemented a full Continuous Delivery system to automatically publish Plague, our entry, on itch.io. The pipeline relies on Github Actions, the same mechanism I use to build and deploy this very blog.
Setting up your own is easy peasy and possibly free!
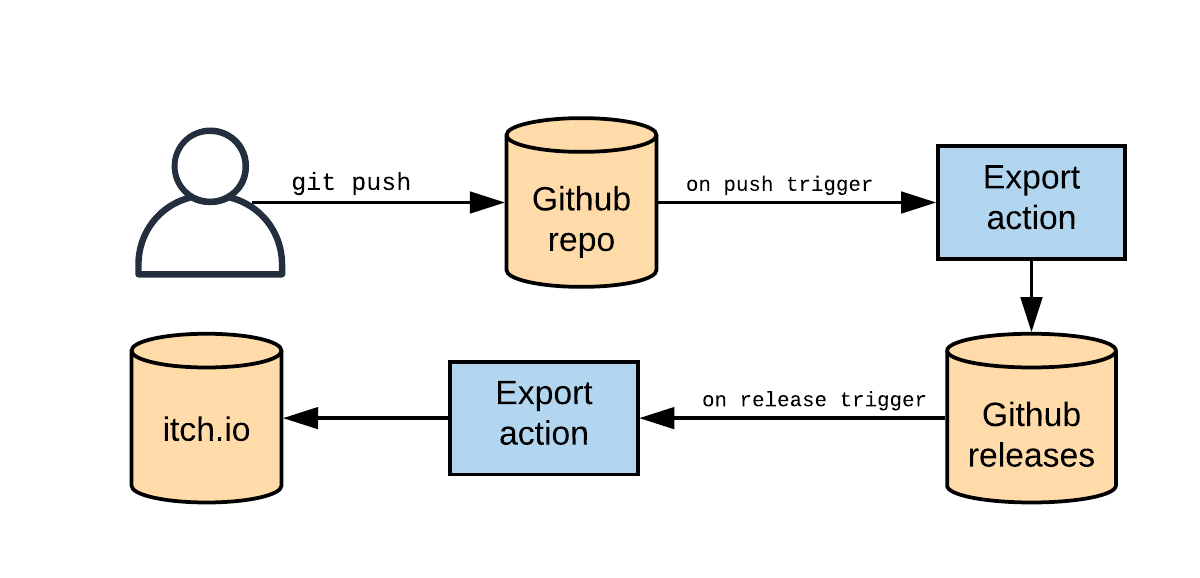
⚒️ Pipeline overview
- Someone pushes to the master branch on the remote repo.
- The game is exported for all available platforms. In this case: Windows, Linux, MacOS and HTML5.
- A new Github release is created with attached files, one per platform.
- The release artifacts are pushed as new versions of the game to itch.io.
🤖 Configure Godot exports
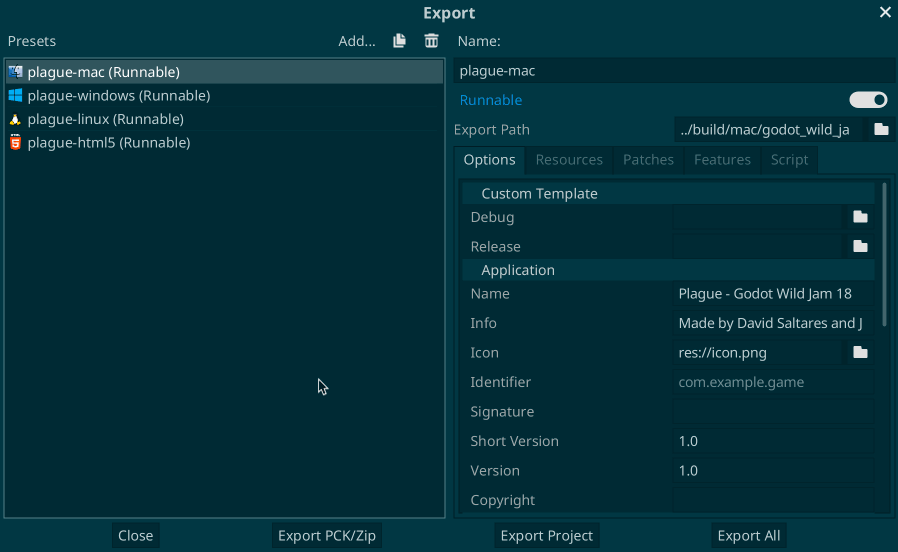
First, you need to setup the export settings in your Godot project. The official exporting guide explains it perfectly. The thing to keep in mind here is that the preset name will determine the name of the published artifact. For example, a preset called plague-mac will result in a release with an attached file called plague-mac.zip.
In the case of our jam entry, we targeted MacOS, Windows, Linux and HTML5.
📦 Export the game
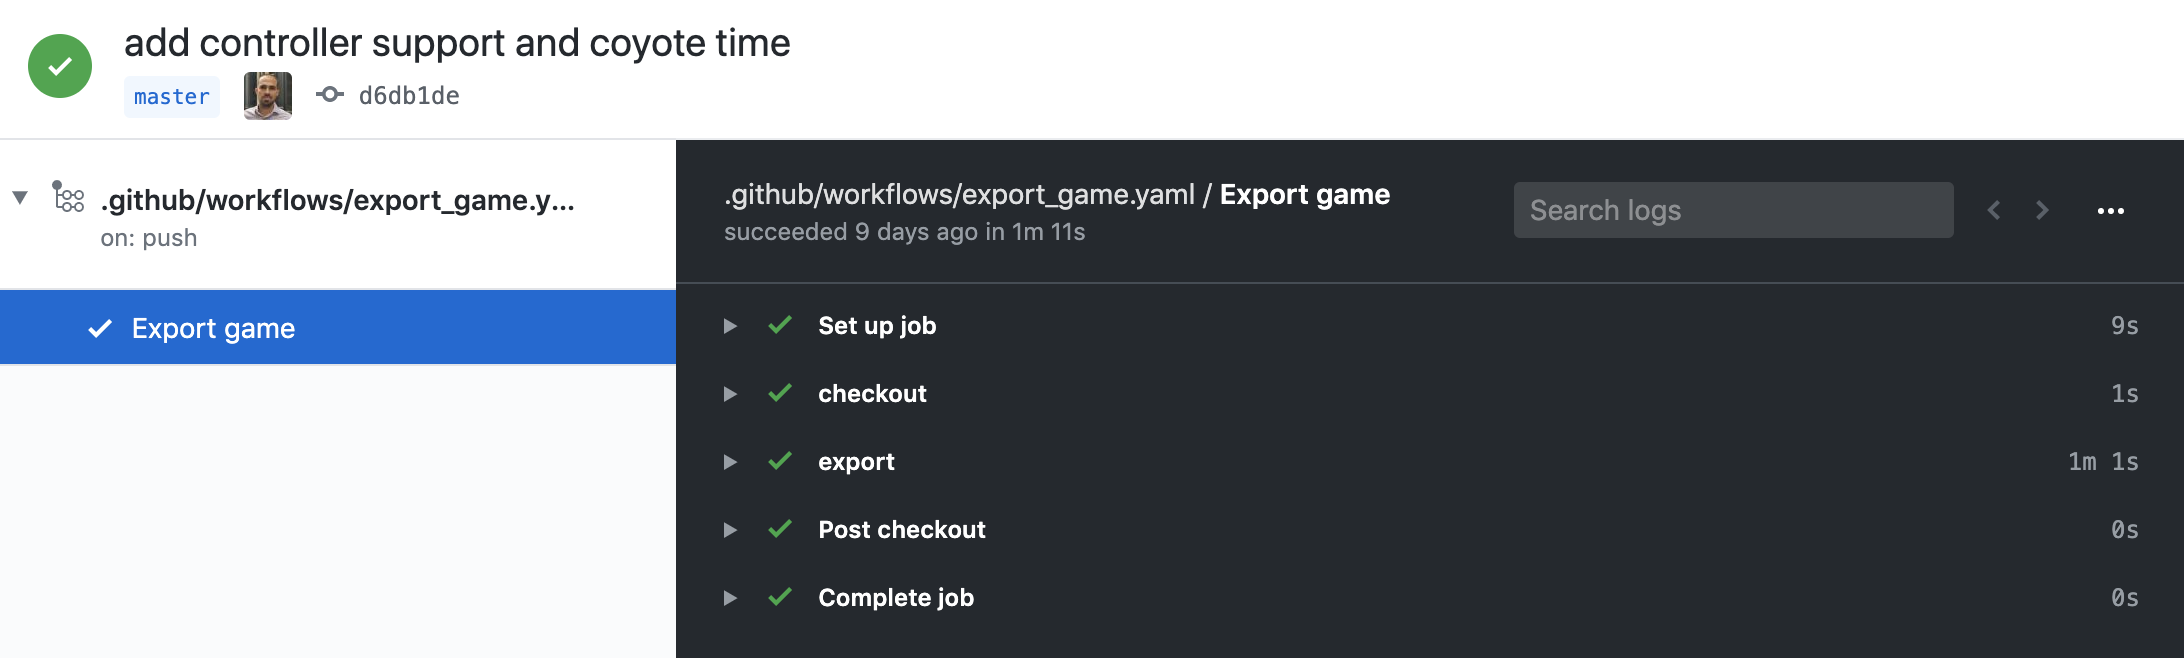
Create a .github/workflows/export_game.yaml file in your repo. We will tell our new action to run on every push to master. We don't want new releases on commits that do not actually change the game. Our Godot project lives in the game folder, so we tell the action to only run if there are changes in that folder.
on:
  push:
    branches:
      - master
    paths:
      - 'game/**'
For the actual export step, we will leverage the Godot Export Github action. The README.md explains its usage very well.
For the action to work, you need to create a personal access token, which will give the export action write access to create a new release. First, create a new token. Then go to https://github.com/<org>/<repo>/settings/secrets/new, paste the key and name the secret EXPORT_GITHUB_TOKEN.
Here's our config in case it helps you. We setup the base version to be published, the links to download the Godot headless executable as well as the templates and tell it our project is located in the game folder in the repo.
jobs:
  export_game:
    runs-on: ubuntu-latest
    name: Export game
    steps:
      - name: checkout
        uses: actions/checkout@v2.0.0
      - name: export
        uses: firebelley/godot-export@v1.1.0
        with:
          base_version: 0.1.0
          godot_executable_download_url: https://downloads.tuxfamily.org/godotengine/3.2/Godot_v3.2-stable_linux_headless.64.zip
          godot_export_templates_download_url: https://downloads.tuxfamily.org/godotengine/3.2/Godot_v3.2-stable_export_templates.tpz
          godot_template_version: 3.2.stable
          relative_project_path: ./game
        env:
          GITHUB_TOKEN: ${{ secrets.EXPORT_GITHUB_TOKEN }}
Whenever you push these changes to your repo, you should already start seeing jobs being triggered and releases being published.
🚢 Ship the game
Butler is the itch.io CLI, which lets you upload builds of your game. Our publish Github action will need to talk to itch.io using a valid API key. In order to get one, install butler and generate a key via butler login. Refer to the docs for the details.
Then, copy your Butler API key and go to https://github.com/org/repo/settings/secrets and create a BUTLER_CREDENTIALS entry with the contents of the key.
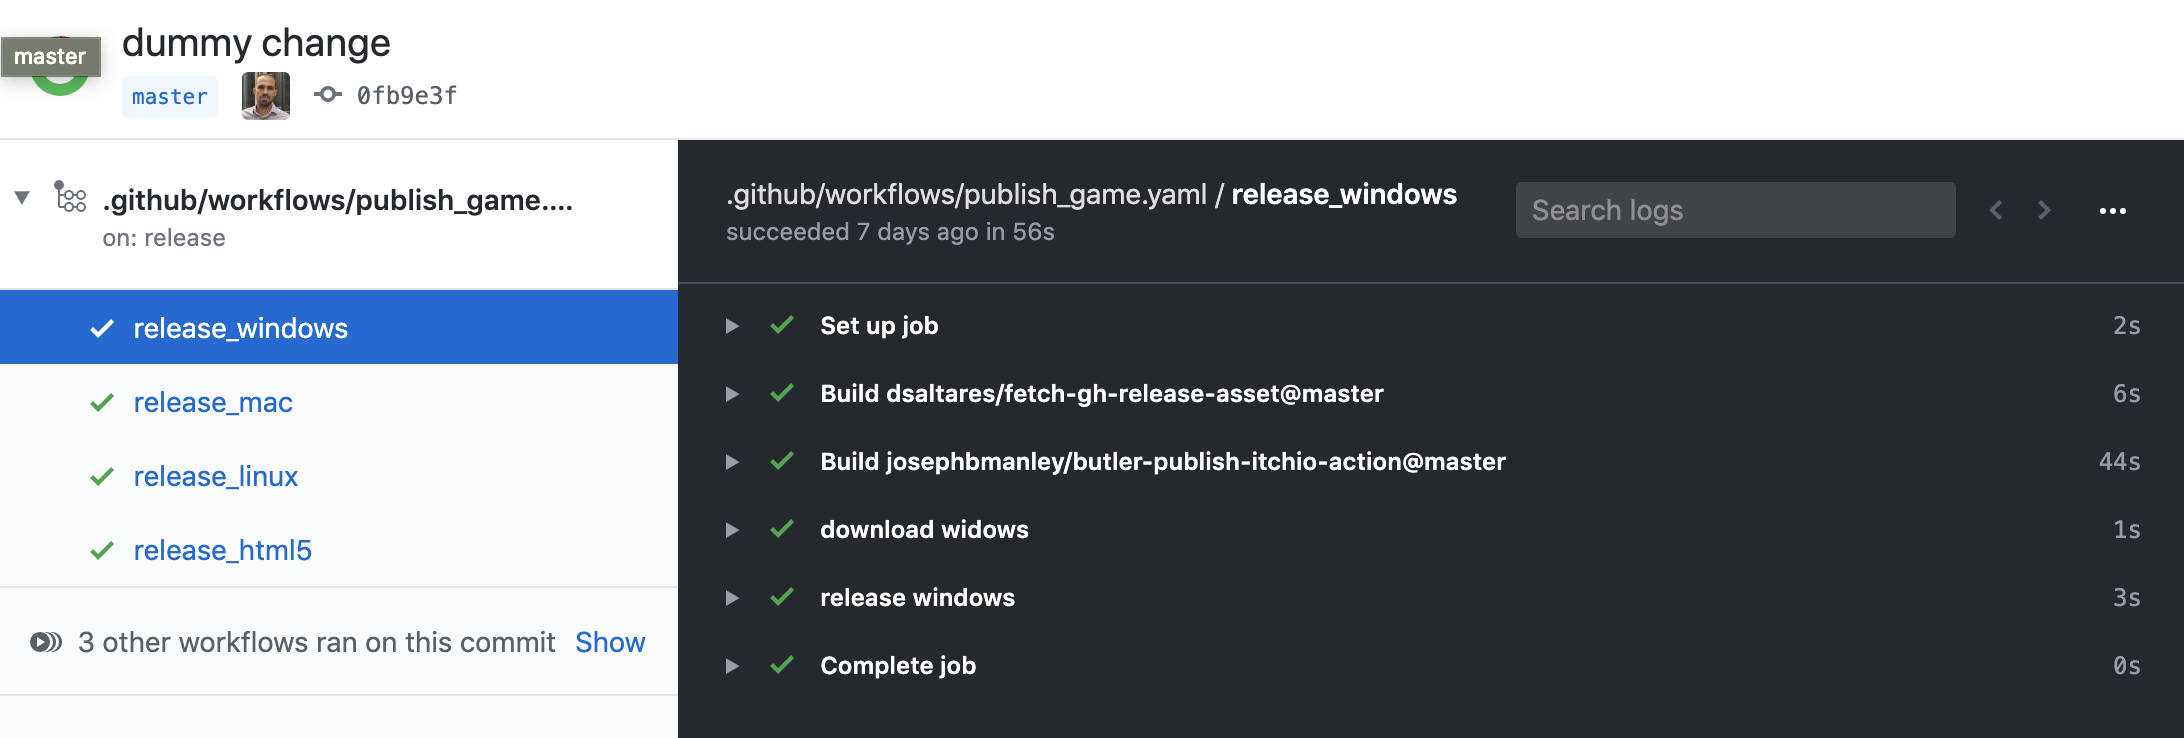
Now create a .github/workflows/publish_game.yaml file in your repo. This action will run every time a new release is created or edited.
on:
  release:
    types: [created, edited]
Our workflow needs to contain a job per platform we want to publish. Each job will leverage the Fetch GH Release Asset and Butler Push actions. We first download the latest release artifact for the platform we want to export and then we call the butler action to push the build to itch.io. When pushing multiple times to the windows channel, each will be considered a new version of the same "product.
Here you can use the secrets.GITHUB_TOKEN, which is automatically populated.
jobs:
  release_windows:
    runs-on: ubuntu-latest
    steps:
      - name: download widows
        uses: dsaltares/fetch-gh-release-asset@master
        with:
          file: plague-windows.zip
        env:
          GITHUB_TOKEN: '${{ secrets.GITHUB_TOKEN }}'
      - name: release windows
        uses: josephbmanley/butler-publish-itchio-action@master
        env:
          BUTLER_CREDENTIALS: ${{ secrets.BUTLER_CREDENTIALS }}
          CHANNEL: windows
          ITCH_GAME: plague
          ITCH_USER: dsaltares
          PACKAGE: plague-windows.zip
That's it! Once you push the publish workflow and make a change to the game, Github will export, create a new release and update your game on itch.io.
On your itch.io game page, you should see something like:
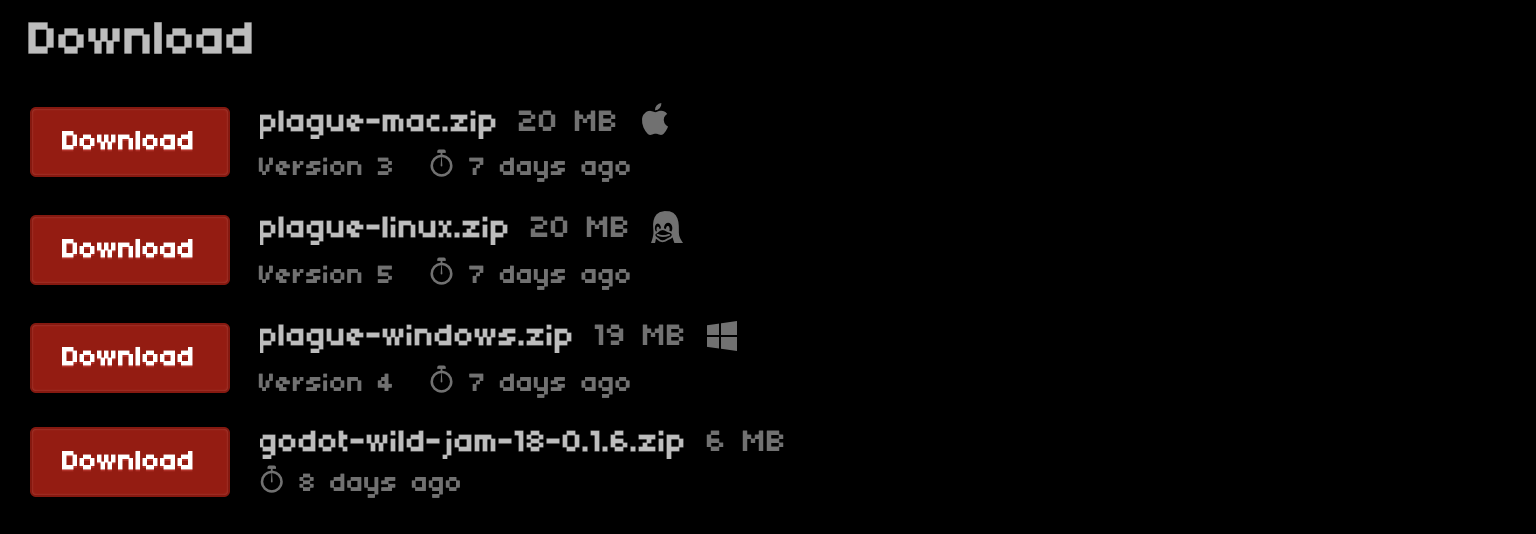
One last thing to remember is that you need to manually tag your HTML build as browser playable from the itch.io website as specified in the Butler docs.. You will only need to do this once as long as future HTML builds have the same channel.
✅ Advantages
- ⏳ Automated. Do not waste time exporting your game regularly and updating various stores.
- 🚀 Fast. Exporting and publishing for a jam sized game takes only 2 minutes.
- 🎥 Restrospect. Check out how your game looked at an arbitrary point in the past without opening the editor.
- 💰 Cost effective. You get unlimited GH Actions minutes for open source projects and 3000 minutes for the Pro plan. That could easily equal 600 builds a month!
- 🤸 Flexible. No need to publish on every push, you can change the triggers to publish on every push to a
releasebranch or simply on a fixed schedule. - 🔭 Extensible. Add jobs to publish to other stores or platforms.
It would be amazing if you let me know your thoughts on this solution. Maybe you have a much better automated process or ideas on how to improve this one!