I had been using a DigitalOcean droplet to host this blog and personal projects for years. But... Do I really need to spend the $6/month? It's just a static Hugo site, which Github pages can do for free. Game hosting on itch.io is also free, it even gives you a mechanism to embed your web games. Looks like I'd be sorted!
Here's a simple CD workflow for deploying a Huge site to Github pages.
Setup your production Github pages repo
Create a Github repo with the name <username>.github.io. Make sure it has a README.md so that you can start pushing to it. Anything pushed to this repo will be accessible from http://<username>.github.io. This will be your production repository. If you have a PRO Github account, you can make the repo private. This means users will be able to access the github.io site but not the repo sources.

Create your dev repository
Create a new repo to host your dev Hugo site from which we will deploy to the production repo. Name it something like <username>.github.io-dev. That's where you will write your Hugo pages in Markdown.

Configure the CD pipeline
Whenever we push to our dev repo, we will build the site and deploy it to the production repo. For that, we will leverage Github Actions. For the dev repo to publish to the production repo, we need them to exchange keys.
Generate a public/private key pair.
ssh-keygen -t rsa -b 4096 -C "<email>" -f publish_key -P ""Now, go to the production repo Settings, Deploy keys and paste the contents of publish_key.pub here.

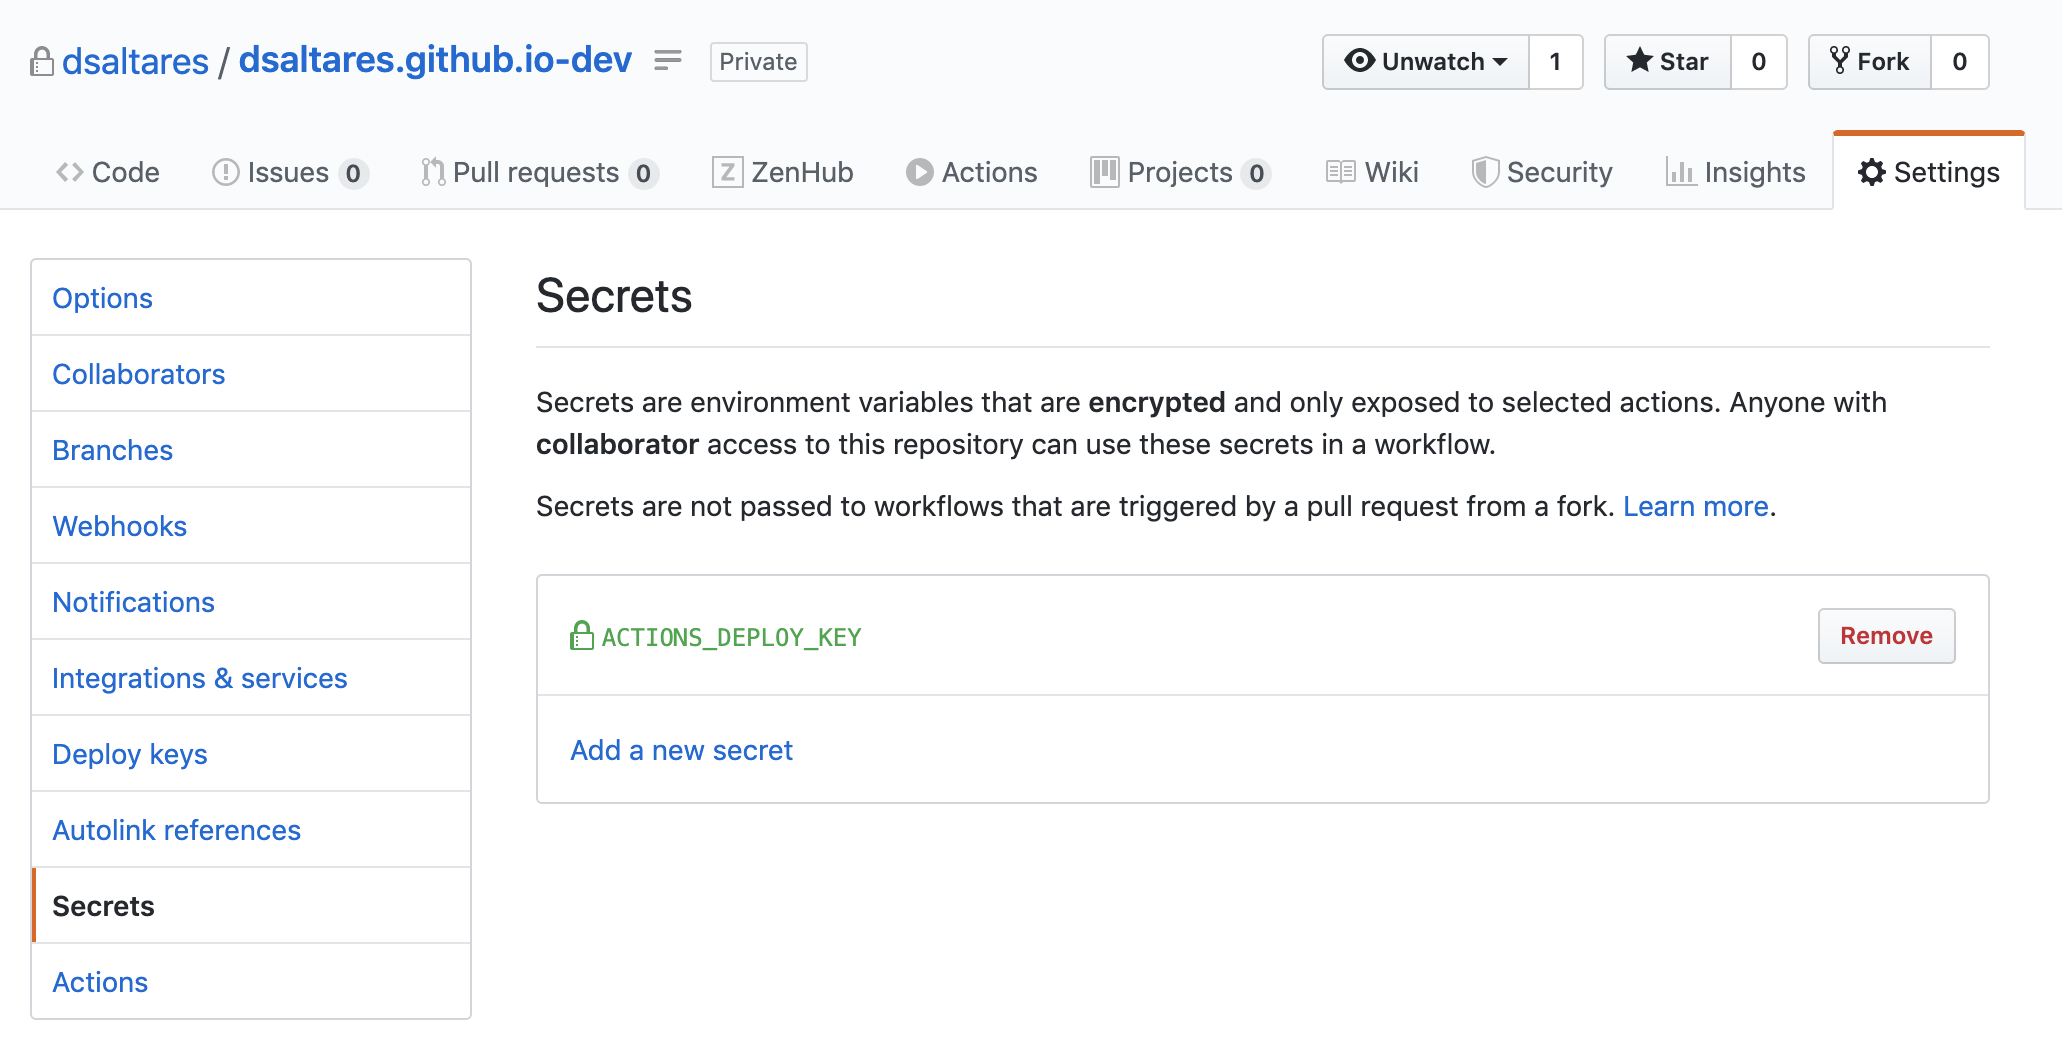
Go to the dev repo Settings, Secrets and add a new secret called ACTIONS_DEPLOY_KEY with the contents of the publish_key file.
Create a .github/workflows/deploy.yml file in your dev repo with the following contents:
name: Build and deploy

on:
  push:
    branches:
      - master

jobs:
  build:
    runs-on: ubuntu-latest
    steps:
      - name: Checkout
        uses: actions/checkout@v1
      - name: Setup Hugo
        uses: peaceiris/actions-hugo@v2
      - name: Build
        run: hugo
      - name: Deploy
        uses: peaceiris/actions-gh-pages@v2
        env:
          EXTERNAL_REPOSITORY: <username>/<repository>.github.io
          ACTIONS_DEPLOY_KEY: ${{ secrets.ACTIONS_DEPLOY_KEY }}
          PUBLISH_BRANCH: master
          PUBLISH_DIR: ./public
After you push this file and every time you push to dev, the Build and Deploy action will be triggered. It will checkout the dev repo, install the latest Hugo binary, build your site and deploy to the master branch of your production repo. Once it's done, the latest version of your site will be available on https://<username>.github.io.

Even though my blog contains hundreds of posts, images and files, Build and Deploy takes less than 1 minute!
Make your domain point to your Github Pages
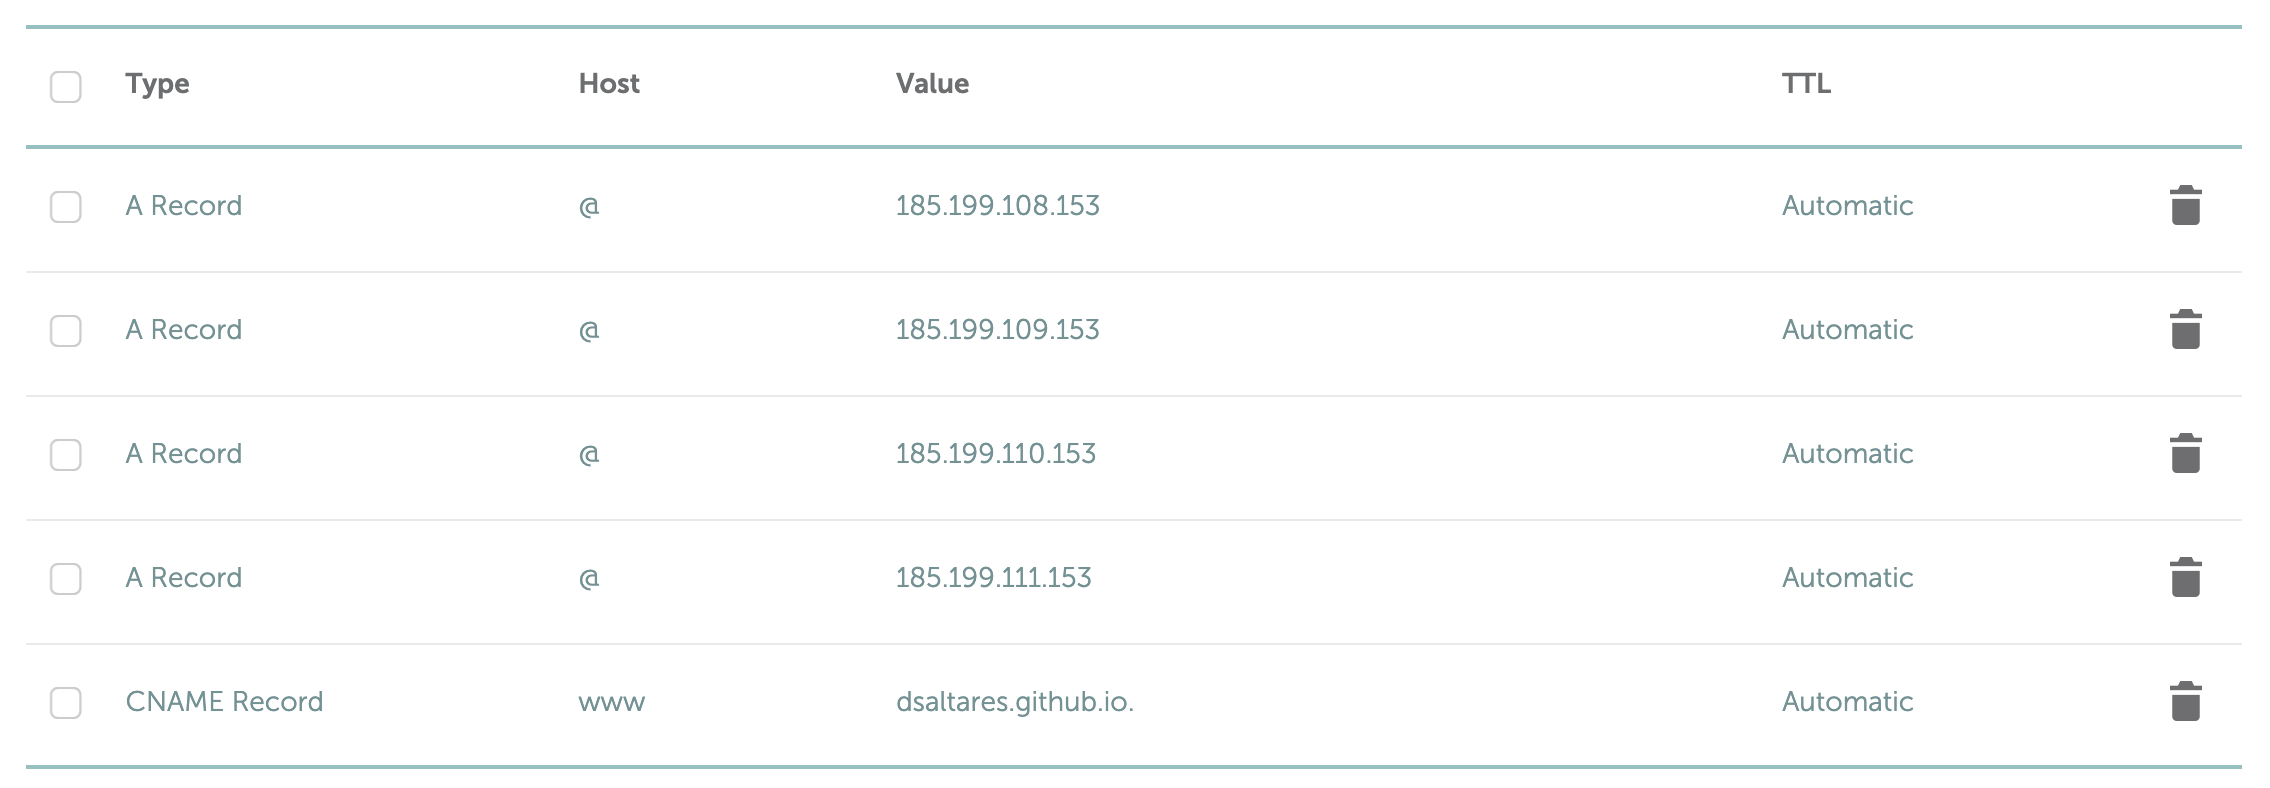
Obviously, this step only applies if you have your own domain. Go to your provider's admin panel and change your domain's DNS records.
- Enter 4
Arecords with@hosts and the Github Pages IPs:185.199.108.153185.199.109.153185.199.110.153185.199.111.153
- Enter a
CNAMErecord withwwwand value<username>.github.io.
The screenshot below shows the Namecheap DNS config panel for my account.
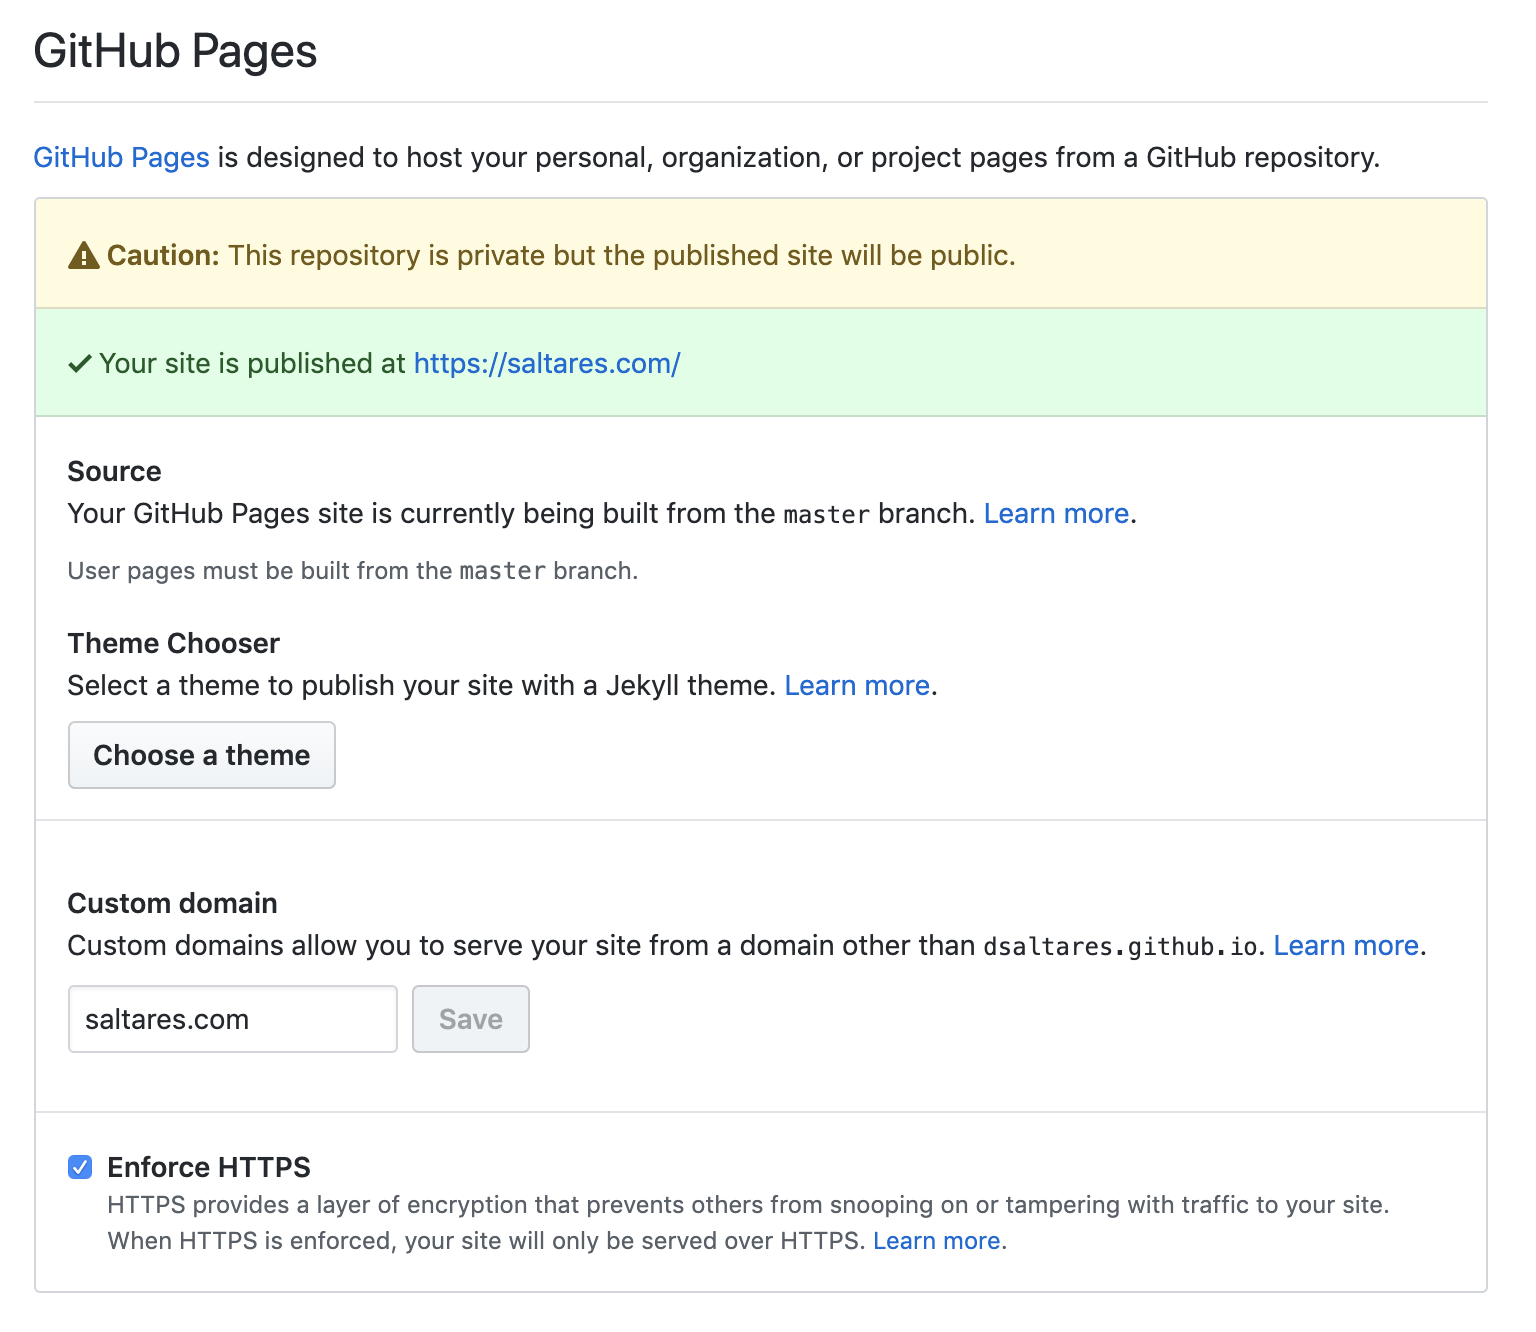
Finally, go to your dev repo and create a static/CNAME file with your domain name. For example, mine contains:
saltares.comOnce that is done and deployed to production, you should see the following in your production repository Settings, inside the Github Pages section. Tick the "Enforce HTTPS" to redirect all traffic from http://<domain> to https://<domain>.
Note that this may take up to 24h to work as your new DNS settings propagate, so be patient!
Done!
It takes some setup but the result is a pretty convenient workflow, definitely an improvement over the git hook based setup I had before.
Let me know if you have any issues with this!